DIY

DIY Sharpie Mug

With the holidays just around the corner (EEEKKK less than a week until Christmas!!), I’ve spent many hours on pinterest looking up potential gift ideas. In my perfect martha stewart world, I would be giving everyone beautiful gift baskets filled with delicious cookies and hand-made crafts. Unfortunately, of my list of crafts, I only got around to making one of my pins. The Sharpie mug.


My co-worker and I were tossing around ideas about what to get our supervisor when we settled on a coffee themed basket. And of course, a custom mug would add the perfect touch! I had envisioned Ontario with a plane flying over top taking some hi-res orthophotography of the province. And since he loves ‘metadata’ so much, we knew we had to incorporate that into the mug somehow. This is what we came up with. mugdraft
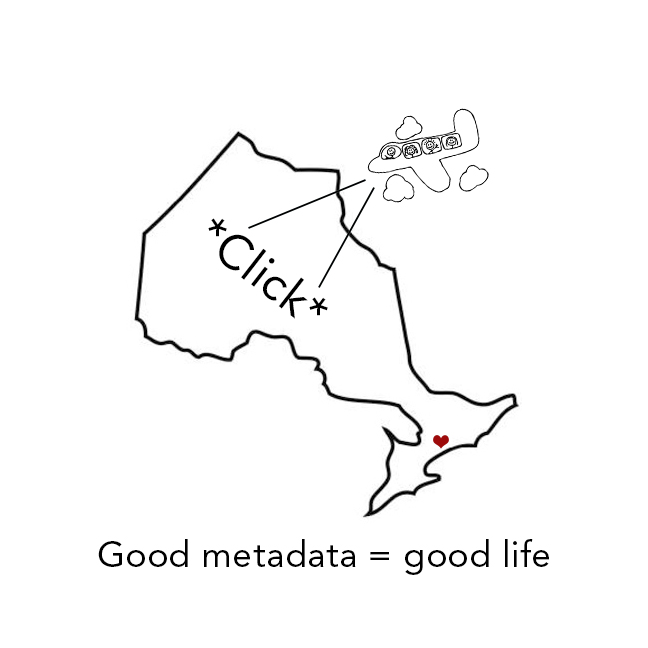
After getting really excited about our craft project, we decided to look up craft fails to see how others faired with similar projects. DISASTER. I quickly learned that regular sharpies NO NOT WORK! The consensus seems to be that oil-based paints were the way to go so off I went to Michaels to pick up supplies. I picked up these oil-based Sharpie paint markers for $4/each and this white ceramic mug from Walmart for $3. whitemug
After doing a few practice drawings, we came to the sad realization that our artistic abilities resembled that of a first graders. How is it that things always look WAY BETTER in your head than they do on paper? We decided to try a less ambitious design. Even then… I’m horrified by our inabilities to draw a nice circle. carrie
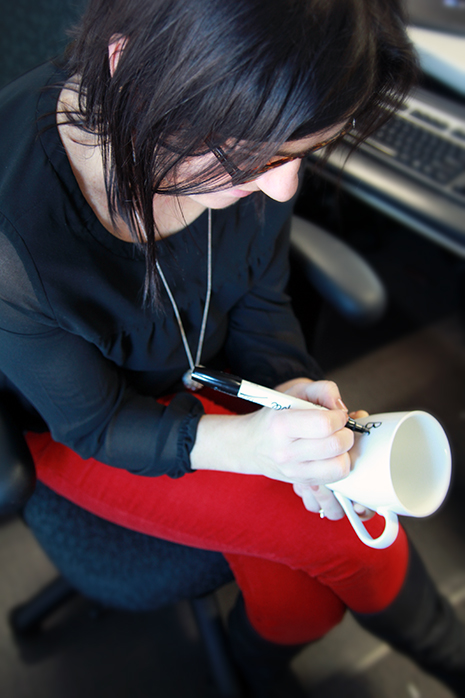
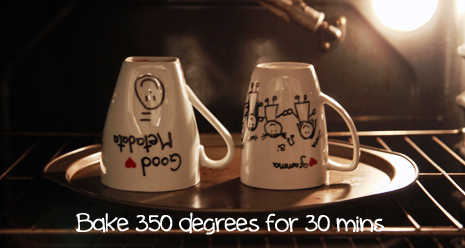
Here’s what they looked like before putting them in the oven to bake.metamug
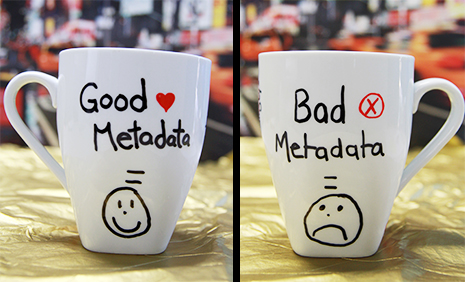
We also included one of his famous quotes on the side.operators
While I was at it, I also made a mug for my grams. For this mug, I attempted to draw each of the cousins. I’d say it was moderately successful. grammaMug
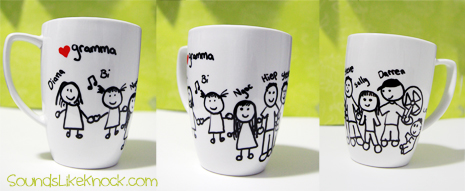
The next step was to throw it in the oven to set the paint. Put the mug in and then turn the oven to 350 degrees and once it reaches this temperature, leave it in for another 30 mins. Once your 30 mins is up, leave it in the oven to cool down.
mugbake

So I can’t say for sure how long the design will last but I gave it a quick rinse under water and the paint seemed to stay on ok.

To complete the gift, we picked up a little basket, a bag of coffee from Natas Cafe, and a box of amazing truffles from the Naked Chocolate. Check out my other post for photos from my visit to the Naked Chocolate.

DIY letter shirts

I’ve never really been a sports fan and I’m almost completely useless in any sports related trivia. However, I’ll take any excuse to get decked out in team colours and cheer.

During summers in Toronto, one of my favourite activities is getting together with a few friends, and buying cheap 500 level tickets to cheer on the Blue Jays. I’m all for foam fingers, face paint, and silly chants. Last friday when we found out that the McMaster Marauders were going to be playing for the Vanier cup at the Rogers Center in Toronto, we jumped at the chance to cheer on our university team (even though I’m really a Waterloo warrior at heart). Getting decked out in maroon was a must, and with 10 of us going, it presented a wonderful opportunity to spell out ‘Marauders’ on our shirts.

I had initially planned on just using fabric paint but then thought, why not use this opportunity to learn something new. Creating a fabric applique makes it easier to have crisp edges, and will survive a little better in the wash. Here are simple step by step instructions on how I added a letter appliqué to my maroon shirt.

IMG_9710

You will need a t-shirt, good scissors, either a fabric stiffiner or an iron on adhesive, fabric for your applique, and a print out of the image or letter you want on your shirt.


1. Print out the image or letter you want and cut it out. Place on it your shirt to make sure it’s the perfect size and that you are happy with how it looks. I used the ‘varsity’ style font to give it more of a ‘university’ look. DIY Custom team letter shirts

2. Place your cut out on your stiffiner or iron-on adhesive and trace around it. Then cut this out of the stiffiner leaving a 1 cm border around the original tracing. This margin is optional but helps when you cut out the shape on the fabric. If your image has a hole in the middle of it, you don’t have to cut that part out. It’s easier to just cut it once the adhesive is ironed on to the fabric.

IMG_9712

3. Take out your ironing board, and place your fabric that you want to use for the applique with the good side facing down on the the board. Then take your iron-on adhesive and place it on top of your fabric. Make sure the size with the wax is facing down, and the paper side is facing up. With the iron on a low setting (IE. Silk), glide it along the adhesive. Follow the instructions that come with yours. Mine suggested 1-2 seconds.
IMG_9714

4. When your adhesive is firmly attached to the fabric, let it cool and cut out the shape using the original tracings. Since you left a 1 cm margin, the stiffness will make it easier to make smooth cuts. Make sure your cut out any circles and shapes in the center of your shapes. I used a ruler and an exacto knife to help keep the edges crisp.


5. You can put the shirt on and mark exactly where you want the letter to sit. A helpful hint to ensure that the letter is right in the middle is to fold your shirt in half, and iron a crease straight down the middle to give you some guidelines.
IMG_9716

6. Peel of the paper from the other side of the applique, place it where you want on the shirt, and with the iron still on the low setting, iron on the letter making sure the edges are firmly attached.


7. At this point, the shirt is ready to wear if you want. I personally prefer stitching around the edges just to help it last a little longer.


8. Put your machine in the zigzag stitch mode. The length and width of the stitch depends on the size of your letter and your personal preference.
IMG_9719

9. Start the stitch at the bottom and work your way around.
IMG_9717
IMG_9722

10. TA DA! Now go wear your shirt with pride!704309_10100387169522197_1640974038_o

A night in Bollywood

There ain’t no party like a Bollywood party!

There’s nothing I love more than a good old fashioned theme party!  So I was ecstatic when Yashy from BabyandLife.com asked me photograph her baby girl’s birthday party. The party was beautifully decorated and amazingly executed. I picked up a few tips that might help you set the mood if you’re ever interested in throwing your very own Bollywood party.


1. Decorating. Find as much fabric as you can. Think bed sheets, pashmina scarves, curtains, throws, etc. Then start draping EVERYTHING! Yashy had everything from the tables, benches, chairs, pillers, and cushions draped in colourful fabrics which set a very cozy and festive atmosphere that suited the theme to perfection. You can also collect a bunch of cushions and lay them down in a corner or area to create a make shift “lounge”.

decorate room at a bollywood party

2. Saris. Lehenga. Dupattas. I learned a lot of new words in my quest to find the perfect outfit. Encouraging guests to borrow or find pieces in their wardrobes that suit the theme really helped pull everything together. For those who live in Toronto, little India on east Gerrard and Coxwell had an abundance of clothing shops. I walked into one and mentioned that I was going to a party and wanted to spend as little as possible. I was advised that a sari, although beautiful and elegant, would be very difficult to pin properly, and would restrict my ability to walk/run. Since I had to be ready and mobile to snap photos, I opted for this forest green 4 piece outfit for $29 (which also included minor alterations!). If you stay minimal on the embellishments, and opt for non-silk fabrics, there are many options for under $50.

3. Party favours/accessories – Head to the dollar store, or any Indian clothing/fabric/accessory store and pick up some bangles  bindis, and stickers. Bangles can be found fairly inexpensively and having a stack of them around your wrist really makes you want to dance and make those bangles jingle.

4. Music. Every party can benefit from a great playlist. I’m not knowledgeable on what songs are popular but I’m sure a quick Google search can help you put together a great medley of songs to help get your guests dancing. Who knows… maybe Songza will put together a “it’s saturday afternoon and I want my guests to shake like they are in bollywood” playlist soon.


5. FOOD FOOD FOOD. Often my parties will just have a few appetizers but since many of the children had early bedtimes, Yashy generously provided dinner. The food was  from Famous Indian Cuisine on Gerrard St in Toronto and it was AMAZING. Their lamb rogan josh may be one of the best pieces of meat I’ve ever put into my mouth.

7. And lastly. Don’t forget to relax and enjoy your party! I know a lot of times, I’m so worried about all the guests and making sure everyone is having a good time that I forget to just enjoy it myself.


Super heroes party

ngoc nguyen dressed as Thor for Avenger's premiere
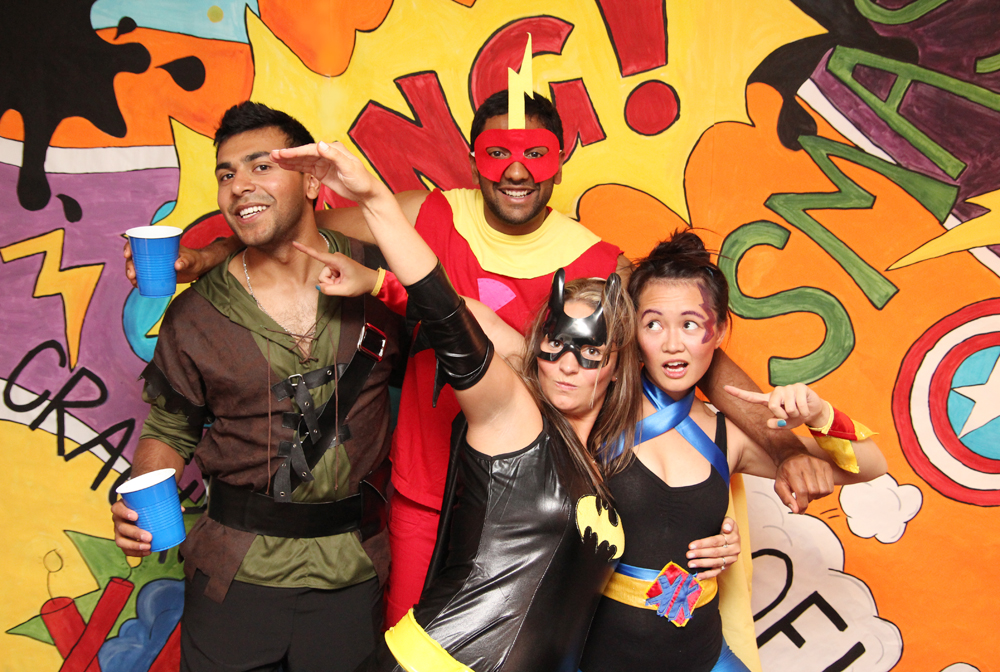
For some reason, people assume I’m really into comic books and that fan expo and comic cons are right up my alley. Maybe it’s because I had been looking forward to the Avengers for half a year. Or maybe it’s because I dressed up like Thor to go see it. (I unfortunately couldn’t get tickets to opening night, so had to wear my costume to the Sunday, 3pm showing… someone high five’d me.. which means I was cool… right?). Whatever their reasons are, I always thought the bf knew me better than that. Until I opened up my birthday present to find a Thor hammer and Captain America Shield. At least he was trying to be creative.
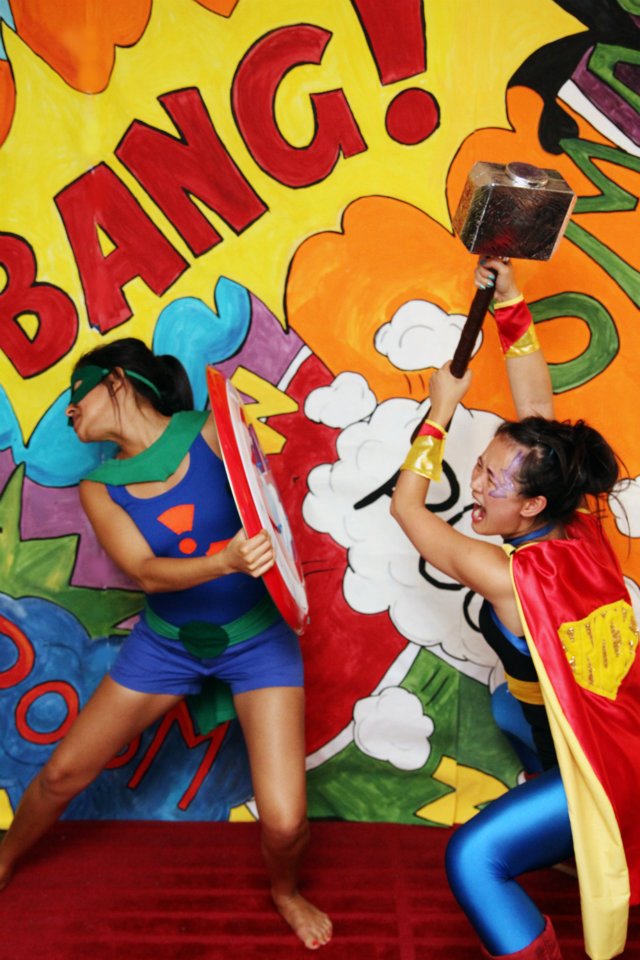
524242_10100303943946917_1351011770_n

Well that’s when the idea of a super hero theme party came about. I mean, I had to find a use for my newly acquired treasures, right?


I love love love theme parties but since I’ve never thrown one for this particular group of friends, I was met with much skepticism. Because of this, I wanted to make sure I set the mood so that the next time I had a theme party, everyone would be pumped instead of weary.


A few tips:

1. I made it a costumes mandatory party. No costumes, no entry. If you are going to enforce this though, be concious of the fact that some people may opt not to come because they are too shy or feel like it’s silly to dress up. I requested at a minimum, people wear a mask or a cape. Give some suggestions of easy costume ideas to help get the creative juices flowing.


2. Advance notice. Let people know well a head of time so that they can go buy or make their costumes. This also prevented people from telling me that they didn’t have “time” to get a costume. I also offered to assist those less creative folk and I had made a few extra masks and capes for those who really struggled.

528871_10100303900244497_328833867_n

3. Movie posters. As a photographer, I firmly believe that people love photographs. I googled popular super hero movies and super imposed the faces of the guest list onto the photos (facebook has made it super easy to get photos of your friends). I put up a photo collage right near the entrance so people could have a little chuckle as they entered the party. I must admit, putting my male friend’s faces on beautiful 6 packs was maybe a little bit more enjoyable than it should have been.


4. Photo back drop. I taped craft paper together to form a giant back drop and bought acrylic paint to paint a fun and colourful backdrop. If you are going to do this, make sure you start well in advance as it took a surprisingly long time to paint and to wait for the paint to dry so I could outline all the letters. I also made a mug shot back drop and bought a small white board so people could write down their super hero name to make it look more legit. Guests had a lot of fun posing and acting out fight scenes all night.

IMG_9298 copyIMG_9187 copy

5. Since it was a birthday party, I had to have some themed cupcakes and cakes. This is actually an older cake from a previous birthday but it would have suited this party perfectly. I unfortunately don’t have any photos of the cupcakes from this party.

Transformer cake

IMG_1460
The guests all had a great time and I’m confident that they’ll be less weary of dressing up for my next theme party.